How to Make Your Subjects Pop in Lightroom Without Flash (2026)
You nailed the exposure. The sky looks dramatic. The background has depth and mood. But your subjects — the couple, the person, the reason you're shooting — look flat. A little dark. Like they belong to a different photo than the one you imagined.
If you've been there, you already know the "right" answer: set up an external flash, use a wireless trigger, and add real light to your subject. And yes, that's the best way to get separation and pop in your portraits. But it's not always the possible way.
What do you do when it's too windy to set up flash equipment? When the location doesn't allow it? When you're 10,000 feet up a mountain at a wilderness elopement with a couple who've been hiking for three hours and you have a 20-minute golden window to shoot in?
That's exactly the situation that pushed me to develop this Lightroom editing technique, and it's become one of the tools I reach for most in my portrait and wedding work.
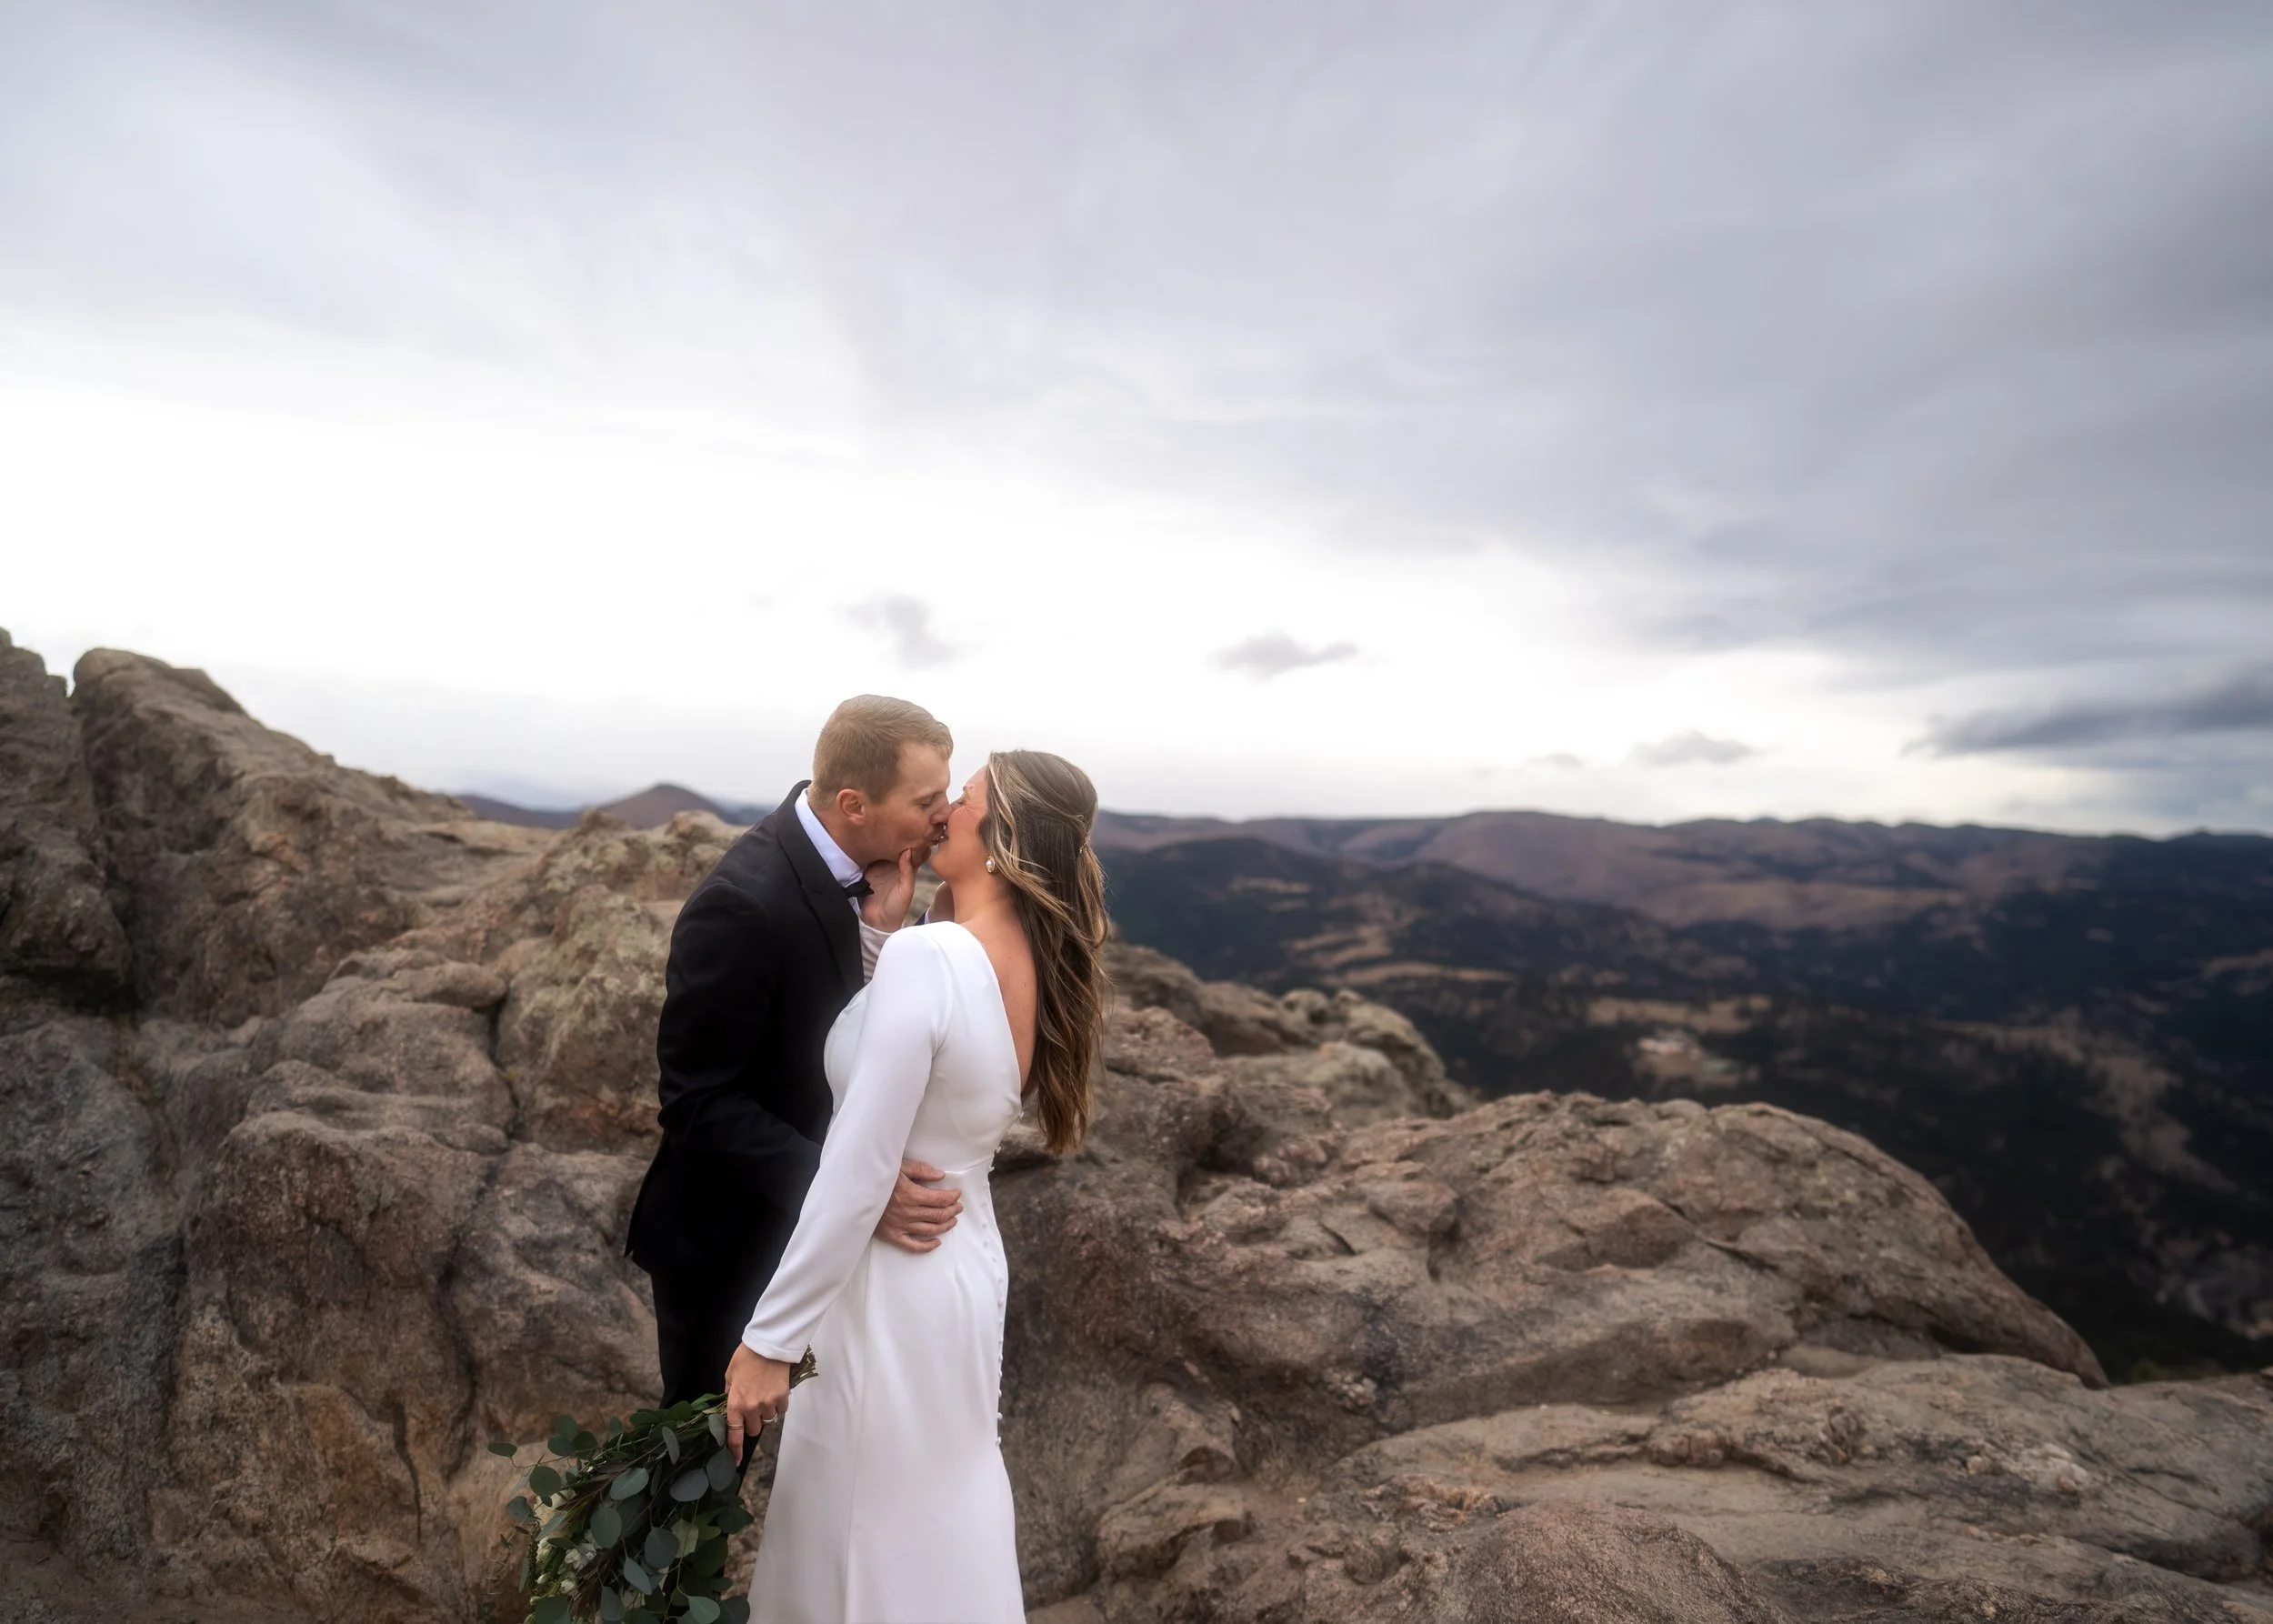
Photo of couple’s elopement that was taken without flash, but edited to look like flash was used
The Problem With the "Just Boost Exposure" Approach
If you've ever tried to rescue a flat-looking subject in post, your first instinct was probably to grab the Exposure slider and drag it up. It seems logical. Your subject is dark, so add light.
The problem is that it looks fake. Immediately, obviously fake. The subject brightens, but in a way that feels completely disconnected from the environment around them. It reads as "edited" rather than "lit," and once a viewer's eye catches that, the image loses its believability.
The technique I'm going to show you in the video below works differently. It uses Lightroom's masking tools in a very specific way, combined with a particular approach to the tone sliders that mimics how actual flash light falls on a subject. The result looks natural — like you had a flash setup, not like you pushed a slider too far in post.
What This Technique Can Do For You
Here's what makes this method worth learning, especially if you shoot portraits or weddings:
It's non-destructive and reversible. Your base edits stay completely intact. You're working inside a mask, not on the global image.
You can sync it across an entire gallery in seconds. Shot 400 frames at a windy mountain elopement? Once you dial in the look on one image, you can push it to every photo in the series without redoing the work manually.
You can save it as a preset. Build it once, use it forever. Any portrait session, any location — apply the preset and Lightroom handles the subject selection automatically.
It works on more than people. Lightroom's subject detection is sophisticated enough that this approach transfers to other subjects as well — cars, pets, objects with clear separation from the background.
Who This Is For
This technique is especially valuable if you're a newer portrait or wedding photographer who hasn't fully invested in a flash system yet, or finds themselves in shooting situations where flash simply isn't practical. It's also useful for experienced shooters who just want a reliable, fast post-processing fallback for those moments when the gear stays in the bag.
If you're editing in Adobe Lightroom or Lightroom Classic, you have everything you need to follow along.
Watch the Full Tutorial
I walk through the entire process step by step in the video below — from setting up the mask correctly, to the specific slider adjustments that make the effect look natural rather than processed, to syncing it across a full gallery and saving it as a reusable preset.
It's one of the more practical Lightroom techniques I've shared, and it's something you can apply to your next session immediately.
Keep Exploring
If you found this useful, I regularly post practical camera and editing tips for photographers who want to make better images without overcomplicating their gear or their workflow. Subscribe to the channel and you won't miss what's coming next.